

KANAKAVALLI VIGNETTES : Swetha Rengasamy - A Pinch of Joy

For many of us food is closely woven with nostalgia; evoking memories of a special place, a person, a feeling. The aromas of a favourite meal can transport us back in time, to a grandmother’s kitchen, or an unforgettable holiday. Through the lockdown, many of us have found solace in food—rediscovering flavours that remind us of home. Dusting off old family recipe books, baking with friends, falling in love with the act of cooking all over again…these are some of the ways we have navigated the uncertainty of these times, seeking comfort in the familiar. Through food we recreate and experience emotions, stay connected with one another, and reconnect with ourselves. The kanjivaram sari, like a beloved family recipe that is handed down through the generations, also draws on memory and stories, becoming an experience that is deeply sensory and symbolic. And this is why we are delighted to bring you October’s Vignette, a story told through food, as we continue to celebrate the kanjivaram.
Swetha Rengasamy is a chef who runs two restaurants in Chennai with her husband. In this edition of Vignettes, Swetha traces her culinary journey and celebrates her love for food through a few of her favourite recipes that define the most memorable times in her life. From her childhood in Chennai to studying cookery in Ireland, from meeting her husband at her first food job to baking virtually with her nieces during lockdown, Swetha picks flavours and memories that, for her, are intrinsically entwined. Having discovered a love for food as a child, she found her happy place in the kitchen—making food her career, her hobby and her passion. For Swetha, comfort food is always South Indian, and baking brings endless joy.
Having discovered a love for Kanakavalli’s kanjivarams while shopping for her wedding trousseau, Swetha takes a break from the kitchen to curate a selection from our repertoire that reflects her love for the flavours and traditions of South India.
Join us as Swetha reminisces the best times of her life through food—sharing some lovely recipes along the way…
A Pinch of Joy: Memories of Food
Remember, remember…
When I think of my childhood in Chennai, the one dish I go back to, again and again, is a classic South Indian potato fry.

Above: (left to right) Swetha's mother serving her father a meal; Swetha as a child with her parents and sister. Most of her childhood memories of food revolve around her family - of her mother and grandmother making delicious food, and of cooking for her father.
Growing up in Chennai, I was very lucky to have two amazing cooks in my family who I always looked up to—my mother and my grandmother. Thanks to the two of them, I was around good food all the time, and I was intrigued by cooking and the idea of being in the kitchen. Many of my earliest memories of cooking are of cooking for my father. When I was finishing school, he was living in Bombay, and would come visit us in Chennai often. No matter how late his flight landed, he would come home to a meal of rasam sadham cooked by my grandmother, and potato fry that I would make for him. We ate mostly South Indian food at home and I grew to love the distinct flavours of the cuisine. I love to bake and experiment with global cuisines, but when it comes to comfort food—that is familiar, reminds me of home and transports me back to my childhood—it is always South Indian.
This potato fry—that always reminds me of my father—is something I make often at home, and I think it goes well with anything, particularly the old favourite—thayir sadham (curd rice).

My Madras Potato Fry
Ingredients
Potato - 3-4, diced into small cubes
Mustard seeds - 1⁄2 tsp
Jeera - 1⁄2 tsp
Oil - 2-3 tbsp
Chilli powder - 2 tsp
Turmeric - 1⁄2 tsp
Hing - 1⁄4 tsp
Curry leaves
Salt
Method
1. Heat oil in a pan; once hot add mustard seeds and jeera.
2. As soon as the mustard seeds start to pop, add the potatoes.
3. Add hing, salt to taste; cover and cook on medium heat for about 5-6 minutes until the potatoes are cooked.
4. Once cooked, remove the lid and continue cooking on low heat for 5-6 minutes till the potatoes turn golden brown.
5. Add chilli powder, curry leaves, and continue to roast until nice and crispy.
Maximum City Days
I discovered vada pav as a young adult exploring the streets and flavours of the maximum city, Bombay.

Above: Swetha discovered the sights and flavours of Bombay as a young adult, including its fantastic street food.
My family moved to Bombay when I started college, and the food there was completely different from what I was used to, but incredible in its own way. Many of the flavours were entirely new to me, but I began to explore all the culinary delights the city had to offer—falling in love with the street food.
Like many people who have grown up or lived in Bombay, the dish that defines my years there is vada pav.

Ingredients for the vada
Potatoes - 2 large (boiled and peeled)
Ginger - 1⁄4 inch
Garlic - 4-5 large cloves
Green chilli - 2
Curry leaves, coriander
Mustard - 1⁄2 tsp
Salt
Turmeric - 1⁄2 tsp
Hing - 1⁄4 tsp
Oil - 1 tbsp + oil for frying
Packaged Bajji Mix
Method
1. Grind ginger, garlic and chilli to a coarse paste.
2. Mash potatoes.
3. Heat oil in a kadai, add mustard seeds and curry leaves.
4. Add the ginger garlic and chilli paste and sauté for 1 minute.
5. Add mashed potatoes, salt, hing and turmeric and cook till the potatoes start to come away from the sides of the pan, around 5-6 minutes.
6. Garnish with coriander. Let it cool.
7. Prepare the bajji batter according to the instructions on the pack.
8. Heat oil for frying. Shape the vada into small balls, coat in the bajji batter and fry till golden.
(Chef’s Tip: I like to fry bits of the bajji batter till crispy and add it to the vada mix before coating it in bajji batter and frying, for added crunch.)
Ingredients for garlic chutney
Garlic - 6-8 cloves
Peanuts - 3 tbsp
Sesame seeds - 1 tbsp
Chilli powder - 1 tbsp
Coconut - 2 tbsp
Salt
Oil - 1 tsp
Method
1. Add oil to a pan, sauté garlic till golden, add peanuts and sesame seeds and sauté for 2
minutes.
2. Add coconut and fry till nice and golden.
3. Take off the heat; add chilli powder and salt.
4. Cool completely and grind to a coarse powder.
To assemble the vada pav slit the pav in half, add the vada, top generously with garlic chutney.
Life is what you bake it!
Baking brings me joy, and I can’t think of anything better than a moist, rich chocolate cake. I bake with my friends, my nieces, and alone, sometimes for no reason at all—just for the love of baking.
I started cooking out of curiosity first, but I found my happy place in the kitchen. Even if there is chaos around me, I always discover a deep sense of calm while I’m cooking. This is something I love about the experience of cooking. Food is now my career, my passion and my hobby.

Above: Swetha with her best friend Sumana, who was her partner at Cakeuran Bakeuran, her first cooking venture.
My first semi-professional experience with food was when I started a bake shop with my best friend Sumana, called Cakeuran Bakeuran, inspired by all things Madras. At the time, I was interning in the city and Sumana had a full-time job. We would come home from full days of work and then stay up baking to fulfil our cake and cupcake orders; and we had an absolute blast. We experimented with recipes and cake decorations, and got pretty creative.
This chocolate cake recipe is an ode to my very first foray into the world of food.

The Turning Point Chocolate Cake
Ingredients
1 3/4 cups (225g) all-purpose flour
1/2 cup (45g) unsweetened Dutch-processed cocoa powder
1 1/2 teaspoons baking powder
1 1/2 teaspoons baking soda
1/2 teaspoon salt
1 1/2 cups (300g) granulated sugar
2 eggs, at room temperature
1 cup (240ml) whole milk
1/2 cup (120ml) grapeseed oil or any mild-flavored oil
1/2 teaspoon pure vanilla extract
1 cup (240ml) boiling water
Method
1. Preheat the oven to 350°F.
2. Grease a 10 by 3-inch round pan with butter, line the bottom and sides of the pan with parchment paper, and grease the paper. (You’re allowed to just grease and line the bottom of the pan, and lightly flour the sides, if you’re feeling lazy!)
3. Place a large sifter or a sieve in a large mixing bowl. Add the flour, cocoa, baking powder,
baking soda and salt, and sift. Add the sugar and whisk until combined.
4. In another large bowl, whisk the eggs, milk, oil, and vanilla together.
5. Gradually add the wet ingredients to the dry ingredients and whisk until there are no lumps and the batter is smooth.
5. Carefully pour in the boiling water and stir until combined. (Watch the little ones with the hot water!)
6. Pour the batter into the prepared pan. Bake in the centre of the oven for approximately 50
minutes or until a wooden skewer inserted in the centre comes out clean, and the cake bounces back when lightly pressed.
7. Remove from the oven and let the cake stand for 10 minutes. Run a butter knife around the
cake to gently release. Peel off the parchment paper from the sides. Invert the cake, peel off the bottom piece of parchment, and cool on a wire rack.
Pasta la Vista, baby…
Among the many essential culinary skills that I learnt at cookery school, was making pasta from scratch—and there’s been no looking back.

Above: At the Ballymaloe Cookery School in Ireland, Swetha had the experience of a lifetime, and learnt the essentials of cooking, including how to make pasta from scratch.
The first cookery show I ever watched was Rachel Allen’s, and I fell in love with her style of cooking. Nigella is also a big food inspiration and one of my all-time favourite chefs. In fact, my first cookbook was Nigella’s Kitchen, a book my brother-in-law brought back for me from the US—carefully carrying it in his hand baggage, which was just as well because he lost all his luggage that trip!
When I decided to do a cookery course, I visited a few schools in the US and in Europe, and I ended up picking the Ballymaloe Cookery School, where Rachel Allen studied and now teaches. I was the only Indian in my batch and it was my first time away from family, but it was an outstanding experience. The school is situated on a 100-acre organic farm and we learnt a little of everything, from farming and cheese making, to knife skills and all the fundamentals of cooking. I also got to learn from the best, including Rachel Allen herself, which was really an unforgettable moment for me.
Although South Indian food has always been a family favourite at home, my grandfather loved Italian food. So, making pasta was not only a new kitchen skill to practice while studying in Ireland, but also something that reminded me of home.

Home and Away Pasta Dough
Ingredients
300g (10oz/2 1/2 cups) “00” flour or regular flour
25g (1oz) semolina flour
pinch of salt
1 large egg and 3-4 large egg yolks, preferably free range
1 teaspoon olive oil
1 teaspoon cold water
Method
1. Sieve the flour into a bowl and add the salt.
2. Make a well in the centre, add the eggs (no need to whisk the eggs), oil and water. Mix into a dough with your hand. The pasta dough should just come together, but shouldn't stick to your hand—if it does, add a little more flour. (If it is too dry, add a little extra egg white being careful not to add too much.)
3. Knead for 10 minutes until it becomes elastic and pliable.
4. Wrap in cling film and rest in fridge for 20 minutes.
5. Divide the dough in half and roll out one piece at a time into a very thin sheet, keeping the other piece covered. You ought to be able to read the print on a matchbox through the pasta. A pasta machine or long thin rolling pin is a great advantage but you can manage perfectly well with an ordinary rolling pin.
6. Allow the pasta to dry for 30 minutes approx. or until just dry to the touch. Roll flat and slice with a chopping knife into whatever thickness you need. Open out and let it run through
your fingers to separate the strands. Use immediately or allow to dry on a lightly floured tray.
Alternatively cut in a pasta machine.
Eat, Work, Love
My first real food job was a truly unforgettable experience, not only because it was my dream job, but also because it’s where I met my husband. The first recipe I created there was a grilled chicken with mango salsa.

Above: Swetha and the team at Ordook, her first food job where she developed recipes, and also met her husband Anush.
After cookery school, I wanted to work for a food magazine, testing recipes or experimenting with food, but I didn’t have any work experience. Fortunately, just as I was wrapping up my course, I got a call from a friend who had started Ordook, Chennai’s first do-it-yourself meal kit delivery and subscription service. I found myself back in Chennai a few months later, working as the chef at Ordook, testing recipes, making recipe cards and doing exactly what I’d dreamt of! The team I worked with was incredible, and it’s an experience I’m so lucky to have had. I also met my husband, Anush, while working there, making it a particularly special time in my life.
This grilled chicken and mango salsa, the first dish I ever created for Ordook, plays with some delicious flavours, and is a recipe I’ll never forget.

The Better Together Grilled Chicken with Mango Salsa
Ingredients
For Chicken
2 Chicken breast
½ tsp salt
1 tsp mixed herbs (organo and thyme)
½ tsp pepper, freshly ground
For Salsa
½ a mango
1 small onion
1 fresh red chilli
¼ tsp salt
1 tbsp lemon juice
1 tbsp olive oil
1 tbsp coriander
For Potato Wedges
2 potatoes
½ tsp salt and pepper
Method
1. Mix chicken with oil, salt, pepper and mixed herbs in a bowl.
2. Place on a pan/tawa on high heat. Place chicken skin side down for 6 minutes and 2-3 minutes on the other side.
3. Mix mango, onion, chilli, salt, lemon juice and olive oil to make a salsa. Garnish with coriander.
4. Wash and peel the potatoes and cut into wedges. Microwave for 4 minutes or until cooked. In the same bowl that you cooked the chicken, add the potatoes, salt, pepper and herbs. Cook in the same pan for 3 minutes or until golden.
5. Serve the chicken with salsa on top and potato wedges on the side.
Hummus where the heart is
Hummus makes everything better! At Mezze, the restaurant Anush and I started, hummus is, without a doubt, our bestseller.
We just celebrated the three-year anniversary of Mezze, the restaurant that my husband Anush and I run together. I handle everything related to the kitchen and menus, while Anush handles everything else—the business and management side of things. When we first happened to see the space which eventually became the restaurant, we fell in love with it—it’s cosy, bright and beautiful. After that, we just went with the flow, and things fell into place. We both love Middle Eastern cuisine, we liked the name Mezze, and within two months the restaurant was open.

Above: Swetha and Anush, her husband, best friend and business partner.
More than husband and wife, Anush and I are the best of friends and I love working with him. He is extraordinarily patient, and I’m the opposite—that’s why he is the one who handles the customers! Working with him has been a breeze, and we recently began another venture together—the Al-Kebab Company. This hummus recipe is a celebration of the three years Anush and I have spent working together on our first baby, Mezze!

The Whole Lot of Love Hummus
Ingredients
250g dried chickpeas
2 tsp baking powder
Juice of a lemon
2 cloves garlic
75g tahini
A handful of finely chopped parsley leaves
Extra virgin olive oil to serve
1⁄2 tsp. paprika
Flat breads to serve
Salt
Method
1. Place the chickpeas into a large saucepan and cover over with water. Cover and leave to soak overnight. Drain and refresh.
2. Tip the soaked chickpeas into a clean pan and cover with 4 inches of water. Add the baking powder and bring to the boil over a high heat. Skim off the foam. Reduce the heat to low and simmer, skimming off any scum as you go, for 1 1/2 – 2 hours or until the chickpeas are beautifully tender. Add more water if they need it. Drain over a bowl, reserving the cooking liquid.
3. Put a handful of chickpeas to one side for garnish and tip the rest into a food processor.
4. Add the lemon, garlic, tahini, 50ml chickpea water and a good pinch of salt.
5. Blend until smooth. If the mix it too thick, loosen with a little more chickpea water. Do a taste test. You can add more tahini to make it richer if you like and salt to taste.
6. Tip the hummus into a serving bowl. Using the back of a spoon, swirl into the bowl to make a well. Add the remaining chickpeas. Pour over the olive oil and add the parsley and a pinch of paprika. Serve immediately with warm flatbreads.
Zoom, zoom…
Through lockdown, one of the things that kept me going was baking—especially baking virtually with my nieces in the US. We made these delicious chocolate chip muffins to beat the isolation blues.
My family has played a really important role in everything I’ve done, supporting me and encouraging me to think through every decision on my food journey. My parents have been a pillar of strength, and while they believed in my food dreams, they also encouraged me to have a back-up plan. When I was sure I wanted to study cookery, they helped me organise trips to America and Europe to visit schools so that I could make an informed decision. Unfortunately, we lost my father before I started Mezze and my other food endeavours, but I think he is always with me in spirit. Without his support, I wouldn’t have been able to pursue my culinary dreams, and do all that I have.
I’m really lucky to have in-laws who are also incredibly supportive. They helped us financially when we first opened Mezze, and they are always excited to see us try new things.

Above (left to right): Swetha's nieces who are her biggest cheerleaders; Swetha with her husband, sister and brother-in-law, her first food critics; Swetha's sister and family who support and encourage her culinary dreams.
My sister hates to cook but loves food, so she’s constantly sending me new recipes to try. My brother-in-law, a big foodie, was my first real food critic. While the rest of the family would shower me with compliments, he was the one to tell me his honest opinion, pointing out what I could do better. He is currently trying to convince me to buy a PPE kit so I can fly to the US and cook for him! My nieces are my biggest cheerleaders, and are always so proud of everything I do. I bake them lots of goodies, and they say the nicest things about me!
One of the highlights of the lockdown for me was baking these delicious chocolate chip muffins with my nieces virtually. I believe that food really does bring people together.

Bake Together Choco Chip Muffins
Ingredients
3 cups (375g) all-purpose flour (spoon & levelled)
3 teaspoons baking powder
1/4 teaspoon baking soda
1/2 teaspoon salt
1 teaspoon ground cinnamon
1/8 teaspoon ground nutmeg (optional)
1/3 cup (5 Tablespoons; 80g) unsalted butter, melted and slightly cooled
1/3 cup (80ml) vegetable oil*
1 cup (200g) granulated sugar
2 large eggs, at room temperature
1/3 cup (80g) sour cream or yogurt, at room temperature*
1 cup (240ml) milk, at room temperature*
1 teaspoon pure vanilla extract
1 and 1/2 cups (270g) semi-sweet chocolate chips*
optional: coarse sugar for sprinkling
Method
1. Preheat oven to 200C. Generously grease a jumbo 6-count muffin pan with butter or line with muffin liners. Set aside.
2. Whisk the flour, baking powder, baking soda, salt, cinnamon, and nutmeg together in a large bowl. Set aside.
3. Whisk the melted butter, oil, sugar, and eggs together until combined.
4. Next, whisk in the sour cream, milk, and vanilla extract, until mixture is a pale yellow.
5. Pour wet ingredients into dry ingredients and fold together with a rubber spatula or wooden spoon until completely combined.
6. Use a whisk to remove any large lumps of flour, if needed. Avoid overmixing. The batter will be thick.
7. Fold in the chocolate chips.
8. Divide batter between each muffin cup, filling all the way to the top. Sprinkle with coarse sugar (for added crunch, recommended!).
9. Bake at 425°F for 5 minutes, then, keeping the muffins in the oven, reduce the oven temperature to 350°F (177°C) and continue to bake for 25-26 minutes until the tops are lightly golden brown and centres are set (stick a toothpick in the centre of a muffin to test. If it comes out clean, the muffins are done).
10. Allow to cool for 10 minutes in pan before serving.
We hope you have a chance to try these recipes and create special food memories of your own!

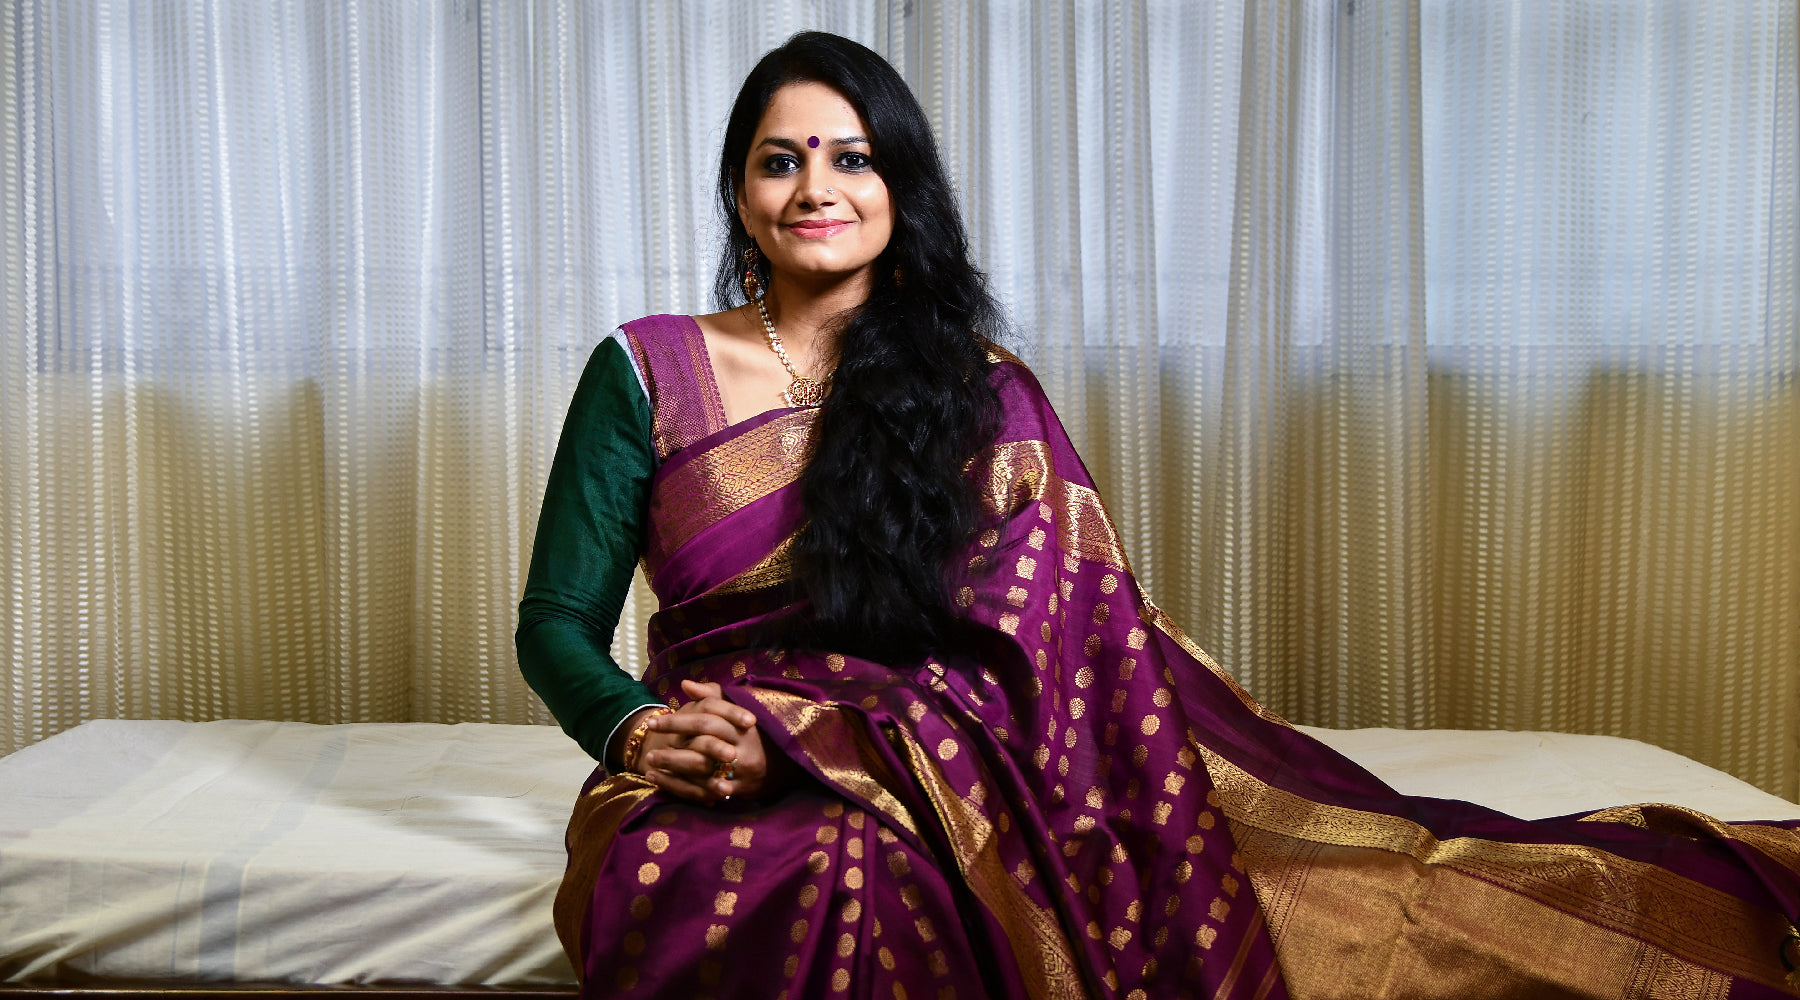
Swetha is wearing a crimson kanjivaram shot with black, adorned with kolam motifs in fine gold zari. The borders are embellished with fine stripes in gold zari, while smaller kolam motifs dot the green pallu.
- Swetha Rengasamy, in conversation with Aneesha Bangera, photography by Raghuram Vedant.
View Swetha's accompanying guest curation here.
